layers LAYERDEPTH
System.Status: ONBOARDING_SEQUENCE

3D_PRINTING
FOR_BEGINNERS

> INITIALIZING ONBOARDING_SEQUENCE...
> SKILL_LEVEL: ZERO_REQUIRED
> TIME_TO_FIRST_PRINT: 20_MINUTES
> OBJECTIVE: BOX_TO_OBJECT_PIPELINE

3D printing turns digital designs into physical objects by building them one layer at a time. Modern printers under 300 dollars auto-level, print at 500mm/s, and produce a finished object within an hour of unboxing. You need a printer, a spool of PLA filament, and a free slicer app — no experience or extra tools required.

LayerDepth is reader-supported. We may earn a commission on purchases through our links. Disclosure

01_WHAT_IS_3D_PRINTING

Here's the thing: 3D printing in 2026 is simpler than most people expect. If you can use a regular paper printer, you can use a modern 3D printer. The technology has matured past the hobbyist-tinkerer phase into genuine consumer-appliance territory.

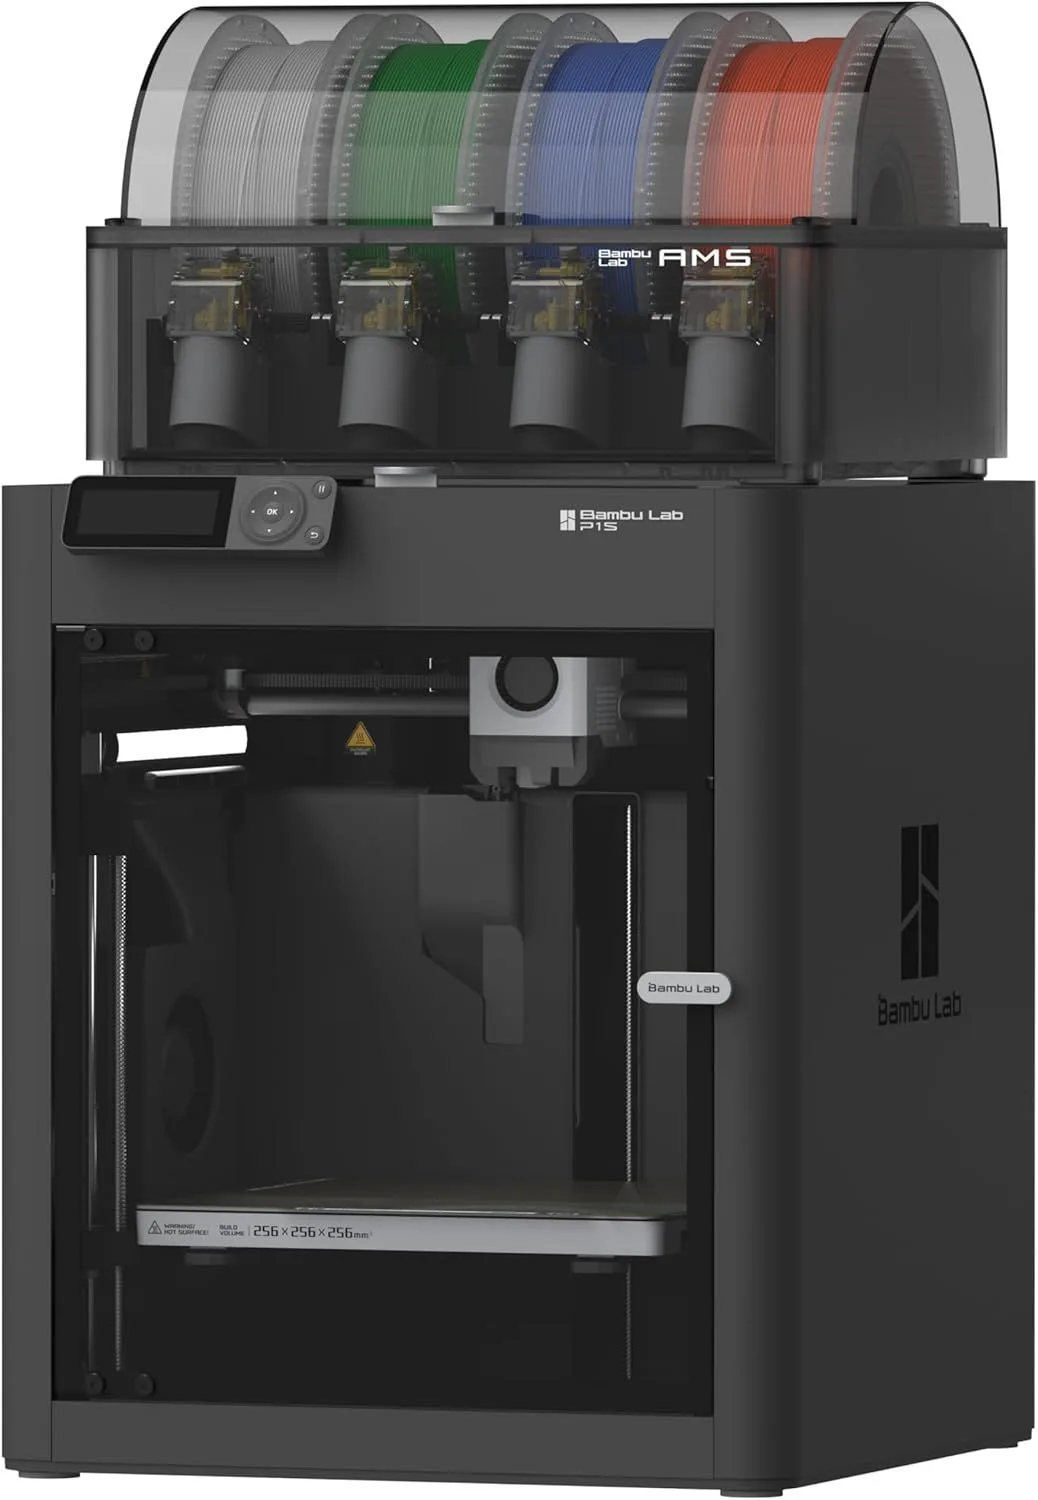
An FDM (Fused Deposition Modeling) printer works by melting a thin plastic strand — called filament — through a heated nozzle and depositing it layer by layer to build a solid object from the bottom up. A digital model file tells the printer where to place each line of plastic. The printer stacks hundreds or thousands of layers to create the finished object. Think of it as a very precise hot-glue gun controlled by a computer.

The other major technology is resin printing, which uses UV light to cure liquid plastic into solid form. Resin produces finer detail but requires chemical handling and post-processing. For beginners, FDM is the starting point — it is safer, cheaper, and covers a wider range of projects. Our FDM vs resin comparison covers when to consider the alternative.

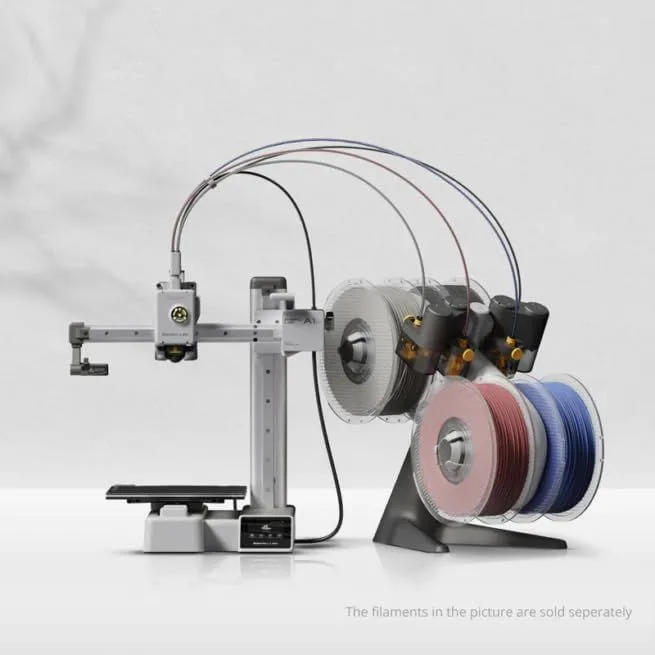
Modern FDM printers like the Bambu Lab A1 Mini handle all calibration automatically. You unbox, load filament, download a model file, and print. The first generation of consumer 3D printers required manual bed leveling, firmware updates, and hours of tuning. That era is over. Current machines auto-calibrate the nozzle height, measure bed surface flatness, compensate for vibration, and monitor print progress — all without user intervention.

02_YOUR_FIRST_PRINT

The path from opening the box to holding a finished printed object takes about thirty minutes on a modern auto-calibrating printer. Here is the sequence.

Step 1: Unbox and assemble. Most printers ship 90% pre-assembled. The A1 Mini requires attaching the spool holder, plugging in two cables, and mounting the display. Total assembly: five to ten minutes. No tools needed beyond what is included.

Step 2: Load filament. Feed the filament end into the extruder entry point. The printer grabs it automatically and feeds it through the heated nozzle. You will see a thin strand of plastic extrude — this confirms the path is clear. Use PLA for your first prints. It is the most forgiving material. Our complete filament material guide covers all material types when you are ready to explore.

Step 3: Download a model. Go to Printables.com and download a simple test object — the classic Benchy boat, a phone stand, or a cable clip. The file you need is an STL or 3MF file. Save it to your computer or a microSD card.

Step 4: Slice and print. Open the file in your slicer software (Bambu Studio for Bambu printers, PrusaSlicer for Prusa, Creality Print for Creality). The slicer converts the 3D model into layer-by-layer instructions. Click "print" — the slicer sends the file to your printer via WiFi or SD card. The printer calibrates itself, heats up, and starts printing.

Step 5: Wait and watch. Watch the first layer closely. If filament is sticking evenly to the bed with no gaps or curling, the print is on track. Walk away. Come back when it is done. Most simple objects take fifteen minutes to two hours.

FIRST_PRINT_KIT

  • Auto-calibrating printer
  • 1kg PLA filament
  • Isopropyl alcohol + cloth
  • Flush cutters for supports
  • Printables.com account
Beginner-friendly setup
ID: BAMBU_LAB_A1_MINI

02b_ESSENTIAL_EQUIPMENT

REQUIRED

  • • 3D printer (auto-calibrating recommended)
  • • 1kg PLA filament (often included with printer)
  • • Isopropyl alcohol 90%+ and microfiber cloth
  • • Flush cutters for removing support material
  • • Computer or phone for slicer software

NICE_TO_HAVE

  • • Scraper/spatula for removing stuck prints
  • • Digital calipers for measuring parts
  • • Deburring tool for cleaning edges
  • • Sealed bags + desiccant for filament storage
  • • Second spool of different color PLA

The total startup cost for a beginner is the printer plus one spool of PLA filament. Everything else is optional. The Bambu Lab A1 Mini ships ready with a starter filament sample, flush cutters, and the scraper you need. IPA and a cloth are the only additional purchase — keep them next to the printer and wipe the bed before every print.

A dedicated workspace matters more than fancy tools. The printer needs a stable, flat surface that does not vibrate when the machine runs. A desk, workbench, or sturdy shelf works. Avoid surfaces near air conditioning vents, open windows, or fans — air currents cause warping on larger prints. The printer itself generates minimal noise (48dB on the A1 Mini — quieter than a conversation) so a living room or bedroom corner works fine for PLA printing.

WiFi connectivity lets you send print files wirelessly from the slicer to the printer. All current Bambu Lab, Creality, and Prusa printers include WiFi. Some also offer built-in cameras for monitoring prints remotely — the P2S streams live video remotely via the Bambu Handy app, letting you check on long prints without walking to the machine.

For a complete cost breakdown including filament, accessories, and ongoing expenses, see our 3D printer cost guide.

02c_SLICER_BASICS

The slicer is the software that turns a 3D model into printable instructions. You will use it for every single print. Three settings matter for beginners — everything else can stay at defaults.

Layer height controls how thick each layer is. Thinner layers (0.12mm) produce smoother surfaces but take longer. Thicker layers (0.28mm) print faster with visible layer lines. We recommend 0.2mm — the standard compromise between quality and speed.

Infill percentage determines how solid the inside of the print is. A decorative object needs 10-15% infill — mostly hollow. A functional bracket that bears weight needs 30-50% infill. A part that gets bolted to something needs 80-100%. Higher infill uses more filament and takes longer.

Supports are temporary scaffolding the printer adds under overhanging sections of the model. Any overhang greater than 45 degrees from vertical needs support. The slicer generates them automatically when enabled. After printing, you break or cut the supports away with flush cutters. Tree supports (available in most slicers) use less material and break away cleaner than standard grid supports.

Print speed affects both quality and time. Default speed profiles (usually 150-300mm/s) work well for most prints. Higher speeds (400-600mm/s) reduce print time but may introduce visible artifacts on detailed geometry. For your first ten prints, use the default "standard" or "normal" quality profile — our top pick for beginners is always the preset that produces the best results with the least risk of failure.

Bed adhesion type determines how the first layer connects to the build plate. "Skirt" (default) prints a test loop around the model to prime the nozzle. "Brim" adds a flat border for better adhesion on parts with small bases. "Raft" prints a full foundation layer underneath — overkill for most prints but useful for very small or tall objects. Start with skirt. Add brim if parts lift at the corners. Raft adds print time and uses more filament, so reserve it for tricky geometries that refuse to stick any other way.

For deeper material knowledge, our filament type comparison guide explains when to use PLA, PETG, ABS, and TPU based on your project requirements.

03_BEGINNER_MISTAKES

We collected the five most common beginner mistakes from community forums. Avoid these and your first month will go smoothly.

Mistake 1: Not cleaning the bed. Fingerprint oils prevent filament from sticking. Wipe the build plate with IPA before every print. This single habit prevents more first-print failures than any slicer setting adjustment.

Mistake 2: Printing too fast too soon. Modern printers advertise 500mm/s speeds, and the temptation to max out on day one is real. Run your first ten prints at default speed settings before experimenting. Learn what a good print looks like at moderate speed, then incrementally push faster. Jumping to maximum speed with unfamiliar filament produces ugly results and teaches bad habits.

Mistake 3: Ignoring filament moisture. An open spool of PLA absorbs enough moisture in a few weeks of humid conditions to cause stringing, popping sounds, and weak layer adhesion. Seal unused spools in bags with desiccant. This matters more with PETG and Nylon. See our filament storage guide.

Mistake 4: Starting with ABS. ABS requires an enclosed printer, high temperatures, and ventilation. It warps aggressively on open-frame machines and emits fumes. Start with PLA. Move to PETG when you need stronger parts. Only attempt ABS if you have an enclosed printer with carbon filtration like the Bambu Lab P2S or Prusa Core One.

Mistake 5: Not watching the first layer. The first layer determines the entire print. If it looks bad — gaps, poor adhesion, dragging — cancel immediately and fix the issue instead of wasting hours on a print that was doomed from the start. Our first-layer troubleshooting guide covers all first-layer fixes.

Our Top Pick

Bambu Lab A1 Mini 3D Printer

The lowest barrier to entry in 3D printing — auto-calibrates, prints within 20 minutes of unboxing, and costs less than most power tools.

04_GROWTH_PATH

The learning curve flattens quickly. After your first dozen prints, you will understand slicer basics, bed adhesion, and support structures. From there, the typical progression looks like this.

Month 1-2: Download and print free models. Learn basic slicer settings: layer height, infill percentage, support generation. Print useful household objects — cable clips, hooks, organizers. Build confidence that the machine works reliably.

Month 3-4: Start modifying existing models in TinkerCAD (browser-based, beginner-friendly CAD). Resize objects, combine parts, add custom text. Experiment with PETG for functional parts that need more strength than PLA. Consider adding multi-color capability — our multicolor systems comparison covers the options.

Month 5-6: Design original parts in Fusion 360 or OpenSCAD. Custom brackets, enclosures, and replacement parts become possible. Experiment with different layer heights and print speeds to optimize for specific use cases. The printer becomes a tool you reach for automatically when you need a solution — not a hobby that needs feeding.

Month 6+: Explore multi-color printing with an AMS or CFS add-on. Print with PETG for outdoor parts and TPU for flexible items. Consider a second printer if the first one is running eight or more hours daily. Many makers eventually own two — a compact budget machine for quick PLA jobs and a mid-range enclosed printer for engineering materials. The CoreXY vs bed-slinger motion guide explains why the upgrade path matters.

For printer recommendations at every budget, our complete first printer buying guide covers the decision in detail. For cost planning, the full cost breakdown at every tier shows what to budget for year one and beyond. And for understanding whether printing is the right investment, our honest cost-benefit analysis breaks down when it pays off and when it does not.

Growth path printer upgrade
ID: BAMBU_LAB_P1S

05_BEGINNER_QUERIES

QUERY_01: WHAT IS THE BEST FIRST 3D PRINTER FOR A ...

The Bambu Lab A1 Mini. It auto-calibrates, prints within 20 minutes of unboxing, runs at 48dB (whisper quiet), and costs under $200. No tinkering, no manual leveling, no frustration. Multi-color is available later via AMS Lite. If you need a larger build volume, the Bambu Lab A1 or Creality K2 SE are the next steps up.

QUERY_02: WHAT FILAMENT SHOULD A BEGINNER START WI...

PLA. It prints at low temperatures, does not warp, produces minimal odor, and works on every printer without special settings. Start with a well-known brand like Hatchbox or the filament bundled with your printer. Move to PETG once you want stronger functional parts, and save ABS for when you have an enclosed printer.

QUERY_03: WHERE DO BEGINNERS FIND MODELS TO PRINT?...

Printables.com (by Prusa), Thingiverse, and MakerWorld (by Bambu Lab) offer millions of free downloadable STL files. Search for what you need — phone stands, cable clips, replacement parts, figurines — download the file, open it in your slicer software, and print. No design skills required for the first months.

QUERY_04: WHAT IS A SLICER AND WHICH ONE SHOULD BE...

A slicer converts a 3D model file (STL) into instructions the printer understands (G-code). Bambu Studio comes with Bambu printers and auto-configures everything. PrusaSlicer is the most popular open-source option. OrcaSlicer is a community fork with advanced features. Start with whatever your printer brand provides — it will have pre-tuned profiles for your machine.

QUERY_05: HOW LONG DOES IT TAKE TO LEARN 3D PRINTI...

First successful print: 30 minutes (modern auto-calibrating printers). Basic slicer proficiency: 2-3 sessions of experimenting with settings. Designing your own simple parts: 2-4 weeks of learning CAD. Designing complex functional parts: 2-6 months. Most beginners download free models for the first 3-6 months before attempting original designs.

QUERY_06: DO BEGINNERS NEED TO LEARN CAD SOFTWARE?...

Not to start. You can print thousands of free models without designing anything yourself. When you are ready, TinkerCAD (browser-based, beginner-friendly) handles simple designs. Fusion 360 (free for personal use) handles everything else. Start printing downloaded models — the urge to design your own will come naturally after you understand what the printer can do.

Now That You Know the Basics

Knowledge loaded. Pick a printer, read the buying guide, or compare the two best entry-level machines side by side.

RELATED_CONTENT

David King
VERIFIED
WRITTEN_BY
David KingFounder

I built LayerDepth to create the detailed, unbiased 3D printer comparison resource I wished existed. With a background in aerospace manufacturing management at Rolls-Royce — overseeing the build and assembly of complete jet engine sections for Airbus and Boeing aircraft — I apply that same demand for rigorous analysis and high standards to evaluating print quality, mechanical reliability, and real-world performance.

Full methodology arrow_forward