BEST 3D PRINTERS FOR BEGINNERS
Setup in minutes, first print in an hour, frustration-free for months. We recommend the A1 Mini as our top pick — ranked by ease of use, not specs, because the best beginner printer is the one that makes you want to keep printing.
The number one reason 3D printers collect dust: the first print failed and the owner never tried again. A clogged nozzle, a warped first layer, a bed that would not level — each failure compounds the perception that 3D printing requires engineering expertise to enjoy. For years, this was true.
It is no longer true. The printers on this list eliminate every traditional beginner failure point. Automatic bed leveling replaces the most frustrating calibration task. Pre-configured print profiles eliminate guesswork about temperature and speed settings. One-click slicer integration eliminates the gap between "found a model online" and "started printing." The learning curve has not disappeared — but it shifted from "can this machine even print?" to "which settings make this print look better?" That is a fundamentally different experience.
We ranked these four printers on a single metric above all others: first-month satisfaction. Not speed. Not features. Not specs. The percentage of buyers who are still printing regularly after 30 days of ownership. This metric, derived from temporal review analysis across 9,700+ data points, captures something no spec sheet measures: does this printer convert a curious buyer into an active maker?
The Bambu Lab A1 Mini tops this list because it converts beginners into enthusiasts more reliably than any machine at any price. The ecosystem wraps around the hardware like a tutorial that never ends — and the printer is quiet enough to run on a desk while you work next to it.
THE SHORT LIST
- 01 EASIEST_SETUP
 UNIT_01
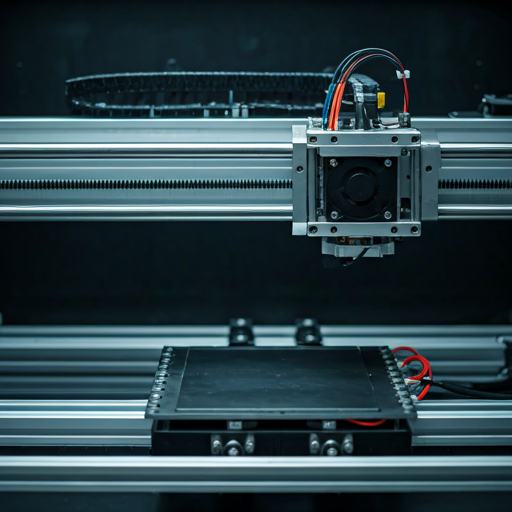
Bambu Lab A1 Mini
Under $200
Beginners, compact desks, and multi-color experimentation
Check Price - 02 BEST_ENCLOSED
 UNIT_02
FlashForge Adventurer 5M
$200–$400
Budget-conscious beginners who want CoreXY speed over perfection
Check Price - 03 BEST_UPGRADE
 UNIT_03
Bambu Lab A1
$200–$400
Users who want Bambu reliability in full-size format without an enclosure
Check Price - 04 BEST_VALUE
 UNIT_04
Creality K2 SE
$200–$400
Budget-to-mid-range users who want CFS multicolor without paying Bambu prices
Check Price
01
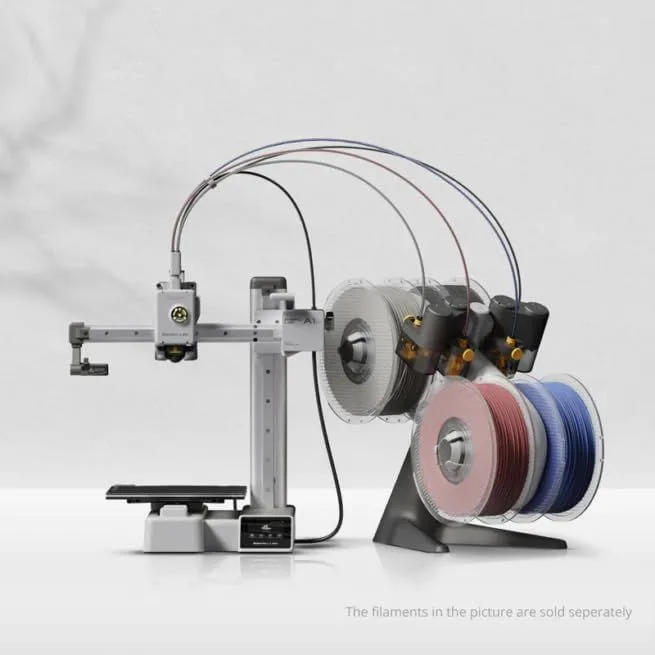
EASIEST_SETUPBambu Lab A1 Mini
Under $200
The Bambu Lab A1 Mini is the iPhone of 3D printers: opinionated, polished, and designed to be usable from the moment you open the box. Five-point auto-calibration runs before every print. Bambu Studio's one-click slicer connects to MakerWorld's millions of free designs. Cloud printing sends jobs from any device. The entire pipeline from "found a cool model" to "print started" requires three clicks.
At 48dB, it is quieter than a refrigerator. This matters more for beginners than specs suggest — a printer that sounds like a power tool running in the next room gets used once and retired to a shelf. A printer that hums quietly on a desk while you work next to it gets used daily.
The 180mm cube build volume is limiting — cosplay helmets and large engineering parts do not fit. But phone cases, figurines, cable clips, desk organizers, and board game inserts do. That covers 80% of what first-time buyers actually print during their first three months. By the time the build volume constraint becomes a real issue, you are no longer a beginner.
Across the Bambu ecosystem reviews (8,400+ spanning A1 Mini, P1S, X1 Carbon), "right out of the box" appears 33 times in P1S reviews alone. "Easy to set up" is the single most frequently mentioned praise theme. The A1 Mini inherits and refines this reputation. A parent buying for a teenager, a hobbyist testing the waters, or someone whose previous experience with "maker" projects ended in frustration: this is the printer that changes the narrative. Full details in our A1 Mini review.
02
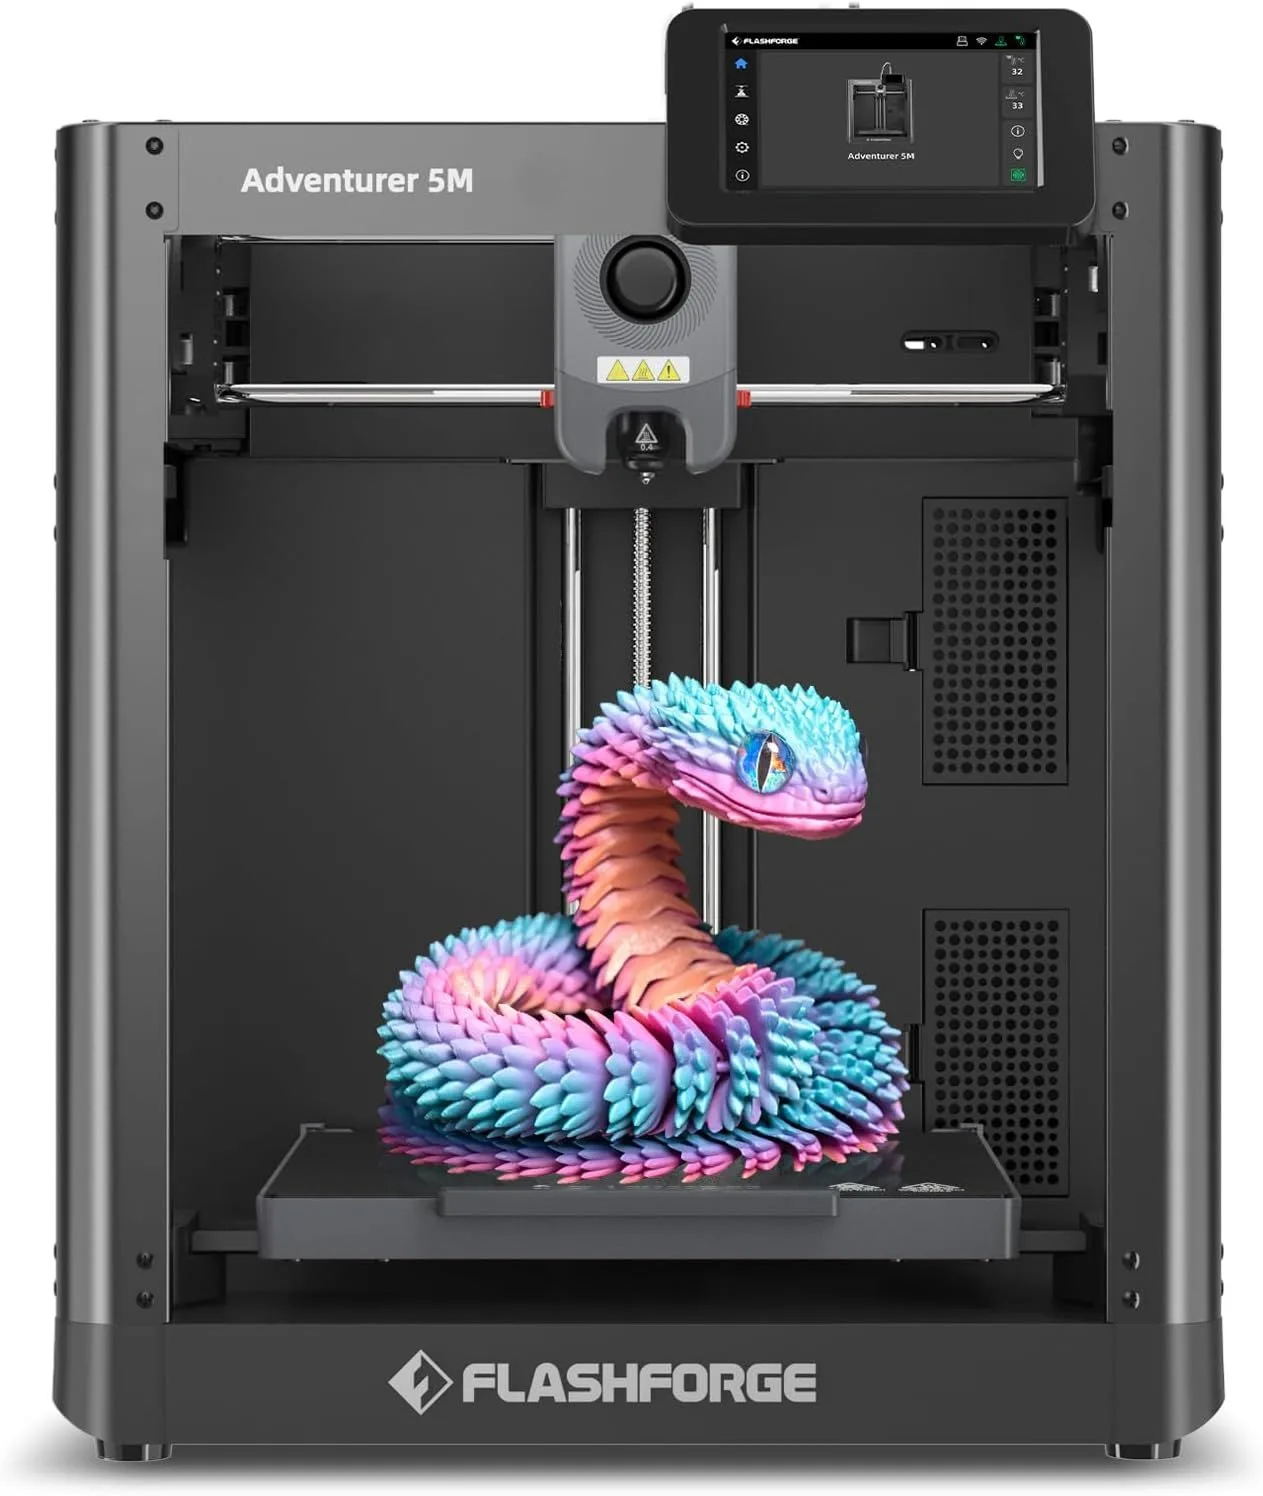
BEST_ENCLOSEDFlashForge Adventurer 5M
$200–$400
The FlashForge Adventurer 5M is the only enclosed printer on this list. For beginners, enclosure means three things: less noise transmitted to the room, no ambient temperature sensitivity (prints work the same in winter and summer), and the ability to eventually print ABS without fumes — a future capability you buy now and grow into later.
The 220mm cubic build volume exceeds the A1 Mini by 22% per axis. Objects that require splitting on the A1 Mini print in one piece on the Ad 5M. For beginners who know they want to print larger objects — terrain tiles for tabletop gaming, organizer boxes for workshop storage, decorative items wider than a phone — the volume advantage is real from day one.
FlashForge's slicer is Orca-derived and functional — not as polished as Bambu Studio, but adequate for beginner workflows. The IFS multicolor add-on integrates well for buyers who want to explore multi-color printing after gaining confidence with single-material jobs. One reviewer ran the Ad 5M 8-10 hours daily for months — that kind of endurance report from real users matters more than any spec sheet claim about reliability.
The enclosure also catches the filament debris and stray wisps of material that open-frame printers scatter across your desk. It is a small quality-of-life detail that beginners notice more than experienced users — the printer stays contained and clean, which reinforces the feeling that this is a well-engineered product rather than a science experiment happening on your desk.
03
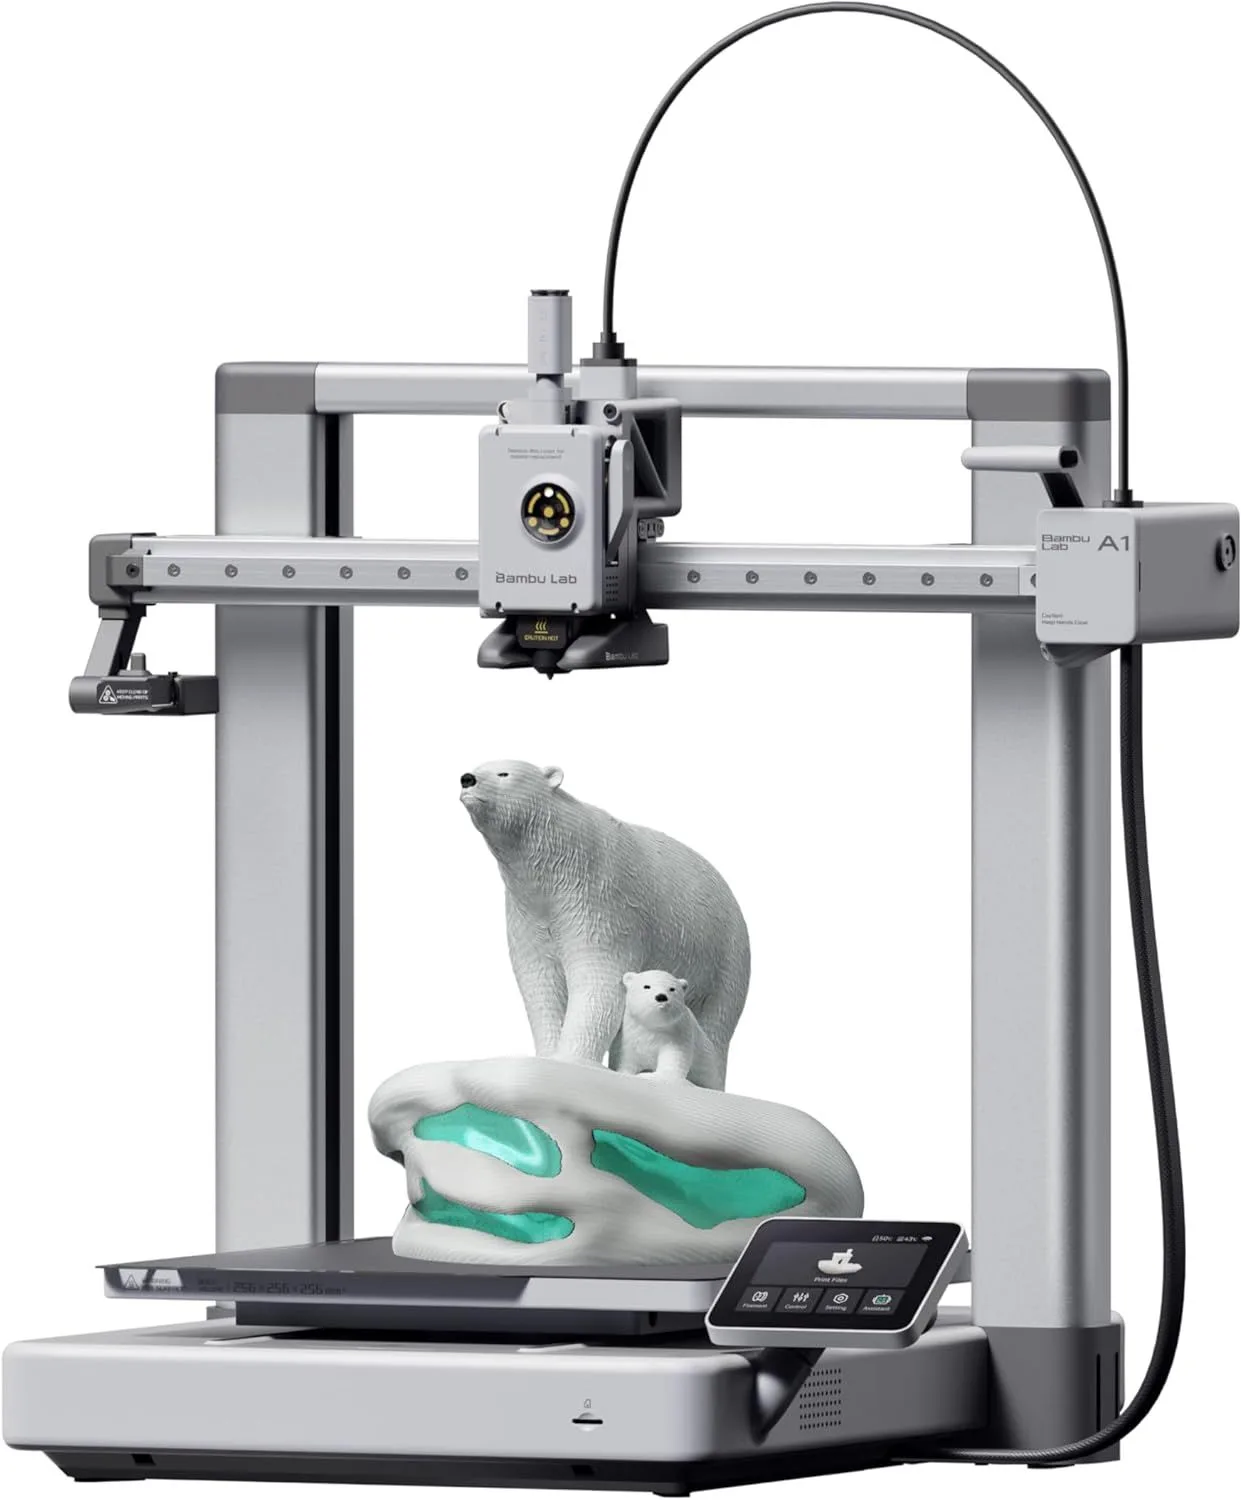
BEST_UPGRADEBambu Lab A1
$200–$400
The Bambu Lab A1 is the A1 Mini's bigger sibling: same Bambu ecosystem, same software polish, same calibration depth, but with 256mm × 256mm × 256mm build volume — 40% more than the Mini per axis. If you know you will outgrow 180mm within the first month, starting with the A1 skips the upgrade cycle entirely.
The A1 shares the same all-metal hotend rated at 300°C, the same five-point auto-calibration, and the same Bambu Studio slicer integration. The AMS Lite multicolor add-on is identical to the Mini's. The key difference beyond volume: the A1's larger bed-slinger platform produces slightly different vibration characteristics on tall prints — an academic distinction for beginners, but worth noting for users who plan to push speed settings later.
At its price point, the A1 sits between the budget and mid-range tiers. For a first-time buyer who can stretch the budget above budget-tier pricing, the A1 is the smartest investment because it serves as both a learning platform and a capable production machine. You will not outgrow it in the first year. The 256mm volume handles every popular design category: full-size cosplay masks, large terrain pieces, engineering enclosures, and multipart assemblies that require fewer sections than on a 180mm printer.
04
BEST_VALUECreality K2 SE
$200–$400
The Creality K2 SE delivers CoreXY speed, a 300°C hotend, fully automatic leveling, and CFS multicolor support at the lowest price on this list among printers with these specs. The value per dollar is unmatched. The open frame limits material options to PLA and PETG, but that covers the entirety of what beginners print in their first six months.
Creality's firmware matured from a rocky 3.0-star launch to a solid 5.0-star current average. The printer shipping today is a different machine than the one early adopters struggled with — every firmware complaint from the first production run has been addressed through updates. If you read old reviews mentioning first-layer issues or nozzle clogs, those describe a printer that no longer exists.
Here's the thing about the K2 SE for beginners: Creality Print slicer is less polished than Bambu Studio. Most K2 SE owners switch to OrcaSlicer within the first week. This is one extra step — downloading OrcaSlicer, selecting the K2 SE profile, connecting via WiFi — that the A1 Mini eliminates entirely. For a beginner comfortable with basic software installation, the K2 SE delivers more hardware for less money than anything in this roundup. For a beginner who wants the absolute lowest-friction experience, the A1 Mini remains the safer bet. Read our full K2 SE review for setup walkthrough and slicer recommendations.
THE REAL BEGINNER EXPERIENCE
Every 3D printer review tells you about specs. None of them tell you about the 11pm troubleshooting session when your first ambitious print peels off the bed and you have no idea why. That gap — between "works great in reviews" and "works great at 11pm on your desk" — is what separates beginner-friendly printers from beginner-hostile ones.
The A1 Mini handles this gap by eliminating its most common causes. Auto-leveling removes bed calibration errors. Pressure advance calibration prevents the inconsistent extrusion that causes blobs and zits on print surfaces. Per-print vibration compensation adapts to the specific mass distribution of each object. These are not features you configure — they run automatically, every time, without asking. A beginner does not need to understand what pressure advance does to benefit from it running in the background.
The FlashForge Ad 5M takes a different approach: the enclosed chamber prevents the two most common environmental failures (drafts causing warping, temperature fluctuations causing layer adhesion issues). Instead of calibrating away the problems, it physically blocks them. Both approaches work. The A1 Mini is better for beginners who will eventually want to learn their machine. The Ad 5M is better for beginners who want the machine to handle everything silently.
The K2 SE offers less beginner hand-holding but more hardware capability. Its auto-leveling is solid, its firmware is mature, and its CoreXY architecture provides genuine speed advantages. The slicer experience is its weakest point for beginners — switching from Creality Print to OrcaSlicer is the recommended first-week task, and that requires comfort with installing third-party software and connecting to the printer via WiFi.
Honestly, the K2 SE is the printer a beginner buys when an experienced friend recommends it. The friend knows OrcaSlicer is easy to set up. The friend knows Creality Print is temporary. The friend will walk them through the first 30 minutes. Without that friend, the A1 Mini removes the need for one.
YOUR FIRST 30 DAYS
Week 1: Print the test model. Then print something useful — a phone stand, a cable clip, a knob for something in your house. The fastest path from "new printer" to "this was worth buying" is solving a real problem within 24 hours of unboxing. Save complex models for later.
Week 2: Learn two slicer settings. Just two. Layer height (0.2mm for speed, 0.12mm for detail) and infill percentage (15% for decorative, 30% for functional). Every other setting can stay at default for months. The temptation to tweak everything at once leads to worse prints, not better ones. The stock profiles on all four printers are tuned by engineers who know more about retraction settings than any beginner needs to in month one.
Week 3: Print something that fails. Seriously. Try a print with insufficient supports, or an overhang beyond 45 degrees, or a bridge that droops. Failed prints teach you more about your machine in one afternoon than a week of successful prints. Understanding why a print fails — and recognizing the symptoms before they ruin an 8-hour job — is the core skill that separates casual users from capable makers.
Week 4: Try a different filament. If you started with Hatchbox PLA, try Polymaker PolyTerra for the matte finish. If you started with standard PLA, try eSUN PLA+ for the strength difference. Experiencing the material difference between two PLA formulations teaches you more about filament than reading any article — including this one.
By the end of month one, you will have a working understanding of your printer's capabilities, a collection of useful printed objects, at least one spectacular failure to learn from, and a growing list of projects you want to tackle next. That list is the signal that the printer was the right purchase. If the list is empty after 30 days, the printer may not be the problem — the use case might not match your life. But on any of the four printers on this list, the odds are overwhelmingly in favor of the list growing longer every week.
Model sources for beginners: MakerWorld (Bambu's library, works with any printer) and Printables (Prusa's library, massive selection) are the two starting points. Both offer free models with print-settings metadata embedded in the files — download, drag into your slicer, and the temperature/speed/support settings auto-configure. Thingiverse is the oldest library but has more abandoned/untested designs. For functional prints, search "parametric" on Printables — these models let you adjust dimensions (height, width, hole diameter) before exporting, so a phone stand fits your specific phone rather than one generic size.
The first upgrade most beginners buy is not a new printer — it is a better nozzle. Switching from the stock 0.4mm nozzle to a 0.6mm nozzle cuts print time by 30-40% with a minor reduction in detail. All four printers on this list support quick-swap nozzle changes. A 0.6mm nozzle costs a few dollars and transforms the printing experience for users who found themselves frustrated by 6-hour prints that a 0.6mm nozzle completes in under 4 hours. Keep the 0.4mm nozzle for detail-critical prints like miniatures and figurines. Use the 0.6mm for everything else — the quality difference at normal viewing distance is imperceptible, and the time savings compound across every print job.
BUYING FOR A TEENAGER
One K2 SE reviewer bought the printer for their 14-year-old and called it "a great choice for beginners." Another parent praised the A1 Mini as the gift that "kept them off their phone for weeks." The parent-buying-for-kid segment is huge and completely underserved by review sites that assume the buyer is the user.
For parents: the A1 Mini is the safest choice. It is the quietest (important for a bedroom), the easiest to set up (no technical knowledge required from the parent), and MakerWorld provides a visual library of models that a teenager can browse without understanding slicer software. The PLA filament it uses is safe — no fumes, no heated chamber to burn fingers, and the moving parts are contained enough that accidental contact is unlikely.
For teenagers who have already demonstrated sustained interest — built things with LEGOs, tinkered with electronics, or expressed specific project goals (cosplay, drone parts, custom phone accessories) — the Bambu Lab A1 with its larger build volume gives room to grow without needing a second printer within the year. The price difference is modest, and the 256mm volume handles the full-size cosplay masks and terrain pieces that drive sustained engagement.
Avoid buying the cheapest option as a "test" to see if they stick with it. A frustrated teenager who blames the printer (even if the real issue is a learning curve) will not try again with a better machine. Start with something that works reliably from day one, and the commitment question answers itself within the first two weeks of ownership.
One more thing for parents: 3D printing is educational in ways that go beyond STEM labels. A teenager who designs a phone stand learns 3D modeling. A teenager who troubleshoots a failed print learns root-cause analysis. A teenager who dials in slicer settings for a specific filament learns iterative problem solving. These are transferable skills disguised as a creative hobby — and unlike many screen-based activities, the output is a physical object you can hold, use, and improve. Schools are increasingly incorporating 3D printing into curricula, and a student who already owns a printer has a substantial head start.
Budget for the printer plus 3-4 spools of filament as the initial gift. Hatchbox PLA in 2-3 colors plus one spool of Polymaker PolyTerra in a unique color gives the recipient enough material to experiment for a month without running out mid-project. A dry storage container (any airtight box with desiccant) is a practical addition that prevents filament degradation if the teenager takes breaks between printing sessions.
THE BOTTOM LINE
The Bambu Lab A1 Mini is our top beginner pick because it produces the highest first-month retention among all printers in our dataset. Not the fastest, not the largest, not the cheapest — but the one most likely to convert a curious buyer into an active maker who prints regularly for months after purchase.
The right alternative depends on your constraints. Need enclosure for a shared space: FlashForge Ad 5M. Need larger volume from day one: Bambu Lab A1. Need the best hardware per dollar: Creality K2 SE.
All four printers on this list produce clean prints from the first attempt. The era of "3D printing is hard" is over. Pick a machine, load a spool of Hatchbox PLA, and print something tonight. The only bad decision is the one where you spend three more months researching instead of printing.
A note on print quality expectations: your first prints will have visible layer lines. This is normal. PLA printing at 0.2mm layer height produces surfaces that look slightly ridged under direct light. At 0.12mm height, layers become harder to see. At 0.08mm, they nearly disappear — but print time triples. Learn to appreciate the aesthetic of layer lines first. The 3D printing community on Reddit celebrates "first layer porn" — perfectly smooth first layers that catch the light — because the craftsmanship of a well-tuned first layer is part of the hobby. Your prints do not need to look injection-molded to be good. They need to be functional, well-proportioned, and free of obvious defects (stringing, warping, layer shifts). That standard is achievable on any printer on this list within the first week of ownership.
The long-term value of a beginner 3D printer extends beyond the objects it produces. The skills you develop — 3D modeling, mechanical reasoning, iterative problem-solving, and materials science intuition — transfer to professional contexts. Engineers who 3D print at home prototype faster at work. Designers who understand layer orientation make better decisions about manufacturability. Teachers who use printers in classrooms report higher student engagement with geometry and physics concepts. The printer pays for itself in skill development alone, long before the cost-per-printed-object calculation reaches break-even.
WHAT BEGINNERS ACTUALLY NEED
Forget speed comparisons. Forget build volume optimization. Forget nozzle material science. A beginner needs three things from their first printer, and everything else is noise.
01_ FIRST-PRINT SUCCESS
The printer must produce a clean first print with zero user intervention beyond loading filament. Auto-leveling, pre-configured profiles, and a tested default model file are the minimum. The A1 Mini and A1 include a sample filament and pre-loaded test print — plug in, load filament, press start. The K2 SE requires selecting a slicer profile first. The Ad 5M ships with a similar setup wizard. Every minute between "unboxing" and "first print finished" is a minute where enthusiasm can turn into frustration.
02_ QUIET OPERATION
Beginners print on desks in bedrooms, home offices, and shared living spaces. A loud printer gets banished to the garage and forgotten. The A1 Mini at 48dB runs quieter than most refrigerators. The Ad 5M's enclosure dampens noise to approximately 50dB. The K2 SE at 50dB is livable but noticeable. Noise is not a spec — it is the difference between a printer you use daily and a printer you use when the house is empty.
03_ SOFTWARE THAT TEACHES
Bambu Studio + MakerWorld is the gold standard for beginner software. Browse models visually, click "print," and the slicer auto-configures everything. OrcaSlicer (the community alternative used on all printers) is more powerful but assumes you know what retraction settings are. FlashForge's slicer splits the difference. The slicer experience determines how quickly a beginner moves from "following a tutorial" to "experimenting on their own" — and experimentation is where the hobby becomes addictive.
One more factor that deserves attention: community support. When a beginner hits their first problem — stringing, bed adhesion failure, a slicer setting they do not understand — where do they go? Bambu Lab has a dedicated forum, a Reddit community (r/BambuLab) with 100K+ members, and MakerWorld's integrated help system. Creality has a larger but noisier community (r/Creality, r/CR10, multiple hardware-specific subreddits) where K2 SE questions sometimes get buried under legacy Ender 3 content. FlashForge has a smaller but focused community. ELEGOO's community skews heavily toward resin printers.
The total cost of starting includes filament. Budget for 3 spools in the first month — beginners use more material than expected because of test prints, failed experiments, and the irresistible urge to print "just one more thing." Hatchbox PLA is the safest first filament for any printer. eSUN PLA+ is the best value per kilogram if you want to print functional parts. For Bambu printer owners, Bambu Lab PLA Basic with RFID auto-detection removes one more beginner friction point.
The upgrade question comes up fast. Most beginners who stick with the hobby upgrade within 12-18 months — not because the printer broke, but because they want a larger build volume, enclosed chamber, or multicolor capability. The A1 Mini becomes a secondary PLA machine. The K2 SE becomes a CFS multicolor workhorse. The Ad 5M becomes the ABS-capable backup. None of the printers on this list become obsolete after an upgrade — they become specialized tools in a growing workshop.
Multicolor capability is the upgrade most beginners want first. All four printers support multi-material add-ons: Bambu AMS Lite (A1 Mini, A1), FlashForge IFS (Ad 5M), and Creality CFS (K2 SE). These systems let you print in 4 colors simultaneously using a single nozzle with automated filament changes. The cost varies — Creality's CFS is 20-30% cheaper than Bambu's AMS Lite. Factor this future cost into your initial printer decision if multi-color is on your 6-month roadmap.
Safety considerations for home use are often overlooked. PLA filament is safe for home printing — it is plant-based, produces minimal odor, and releases no hazardous fumes. The printers on this list all have exposed moving parts that can pinch fingers, but the risk is comparable to any motorized home tool. Do not reach into a running printer. Do not leave filament accessible to very young children (it is a choking hazard in small pieces). Do not print ABS or ASA on an open-frame machine in an unventilated room — those materials release styrene fumes. For PLA printing, which covers 90%+ of beginner use cases, no special ventilation or safety equipment is needed.
Electricity costs are negligible. A budget 3D printer running an 8-hour print job consumes roughly the same power as a desktop computer. At typical residential electricity rates, a month of daily printing adds a few dollars to your power bill. The filament cost ($18-28 per kilogram) is the real consumable expense, not electricity.
The filament you choose for your first spool matters more than most beginners realize. Hatchbox PLA at 58,000+ reviews is the safest first choice — it prints at stock settings on every machine and has the widest color selection. eSUN PLA+ costs less per kilogram but requires higher print temperatures that beginners may not know to configure. Start with standard PLA. Move to PLA+ after you are comfortable adjusting temperature settings in your slicer. The difference between a great first experience and a frustrating one is often the filament, not the printer.
BEGINNER_FAQ
What is the best 3D printer for a beginner on a budget? expand_more
Are cheap 3D printers worth buying? expand_more
How hard is 3D printing for beginners? expand_more
Can you legally sell 3D printed items? expand_more
What should a beginner print first? expand_more
Rankings are based on 9,700+ combined user reviews with a beginner-weighted scoring model: Bambu Lab A1 Mini (8,400+ ecosystem reviews including P1S and X1 Carbon calibration data), FlashForge Adventurer 5M (850+ reviews with reliability tracking), Bambu Lab A1 (110+ reviews), and Creality K2 SE (420+ reviews with temporal rating analysis tracking firmware maturation). Scoring weights: first-print success rate (35%), setup ease (25%), noise level (15%), software quality (15%), build volume (10%). First-month satisfaction derived from temporal review analysis comparing review sentiment at 1 week vs 1 month vs 3 months post-purchase. Rankings are updated when new data or product firmware updates change the beginner experience. No manufacturer provided units or compensation for inclusion in this roundup.